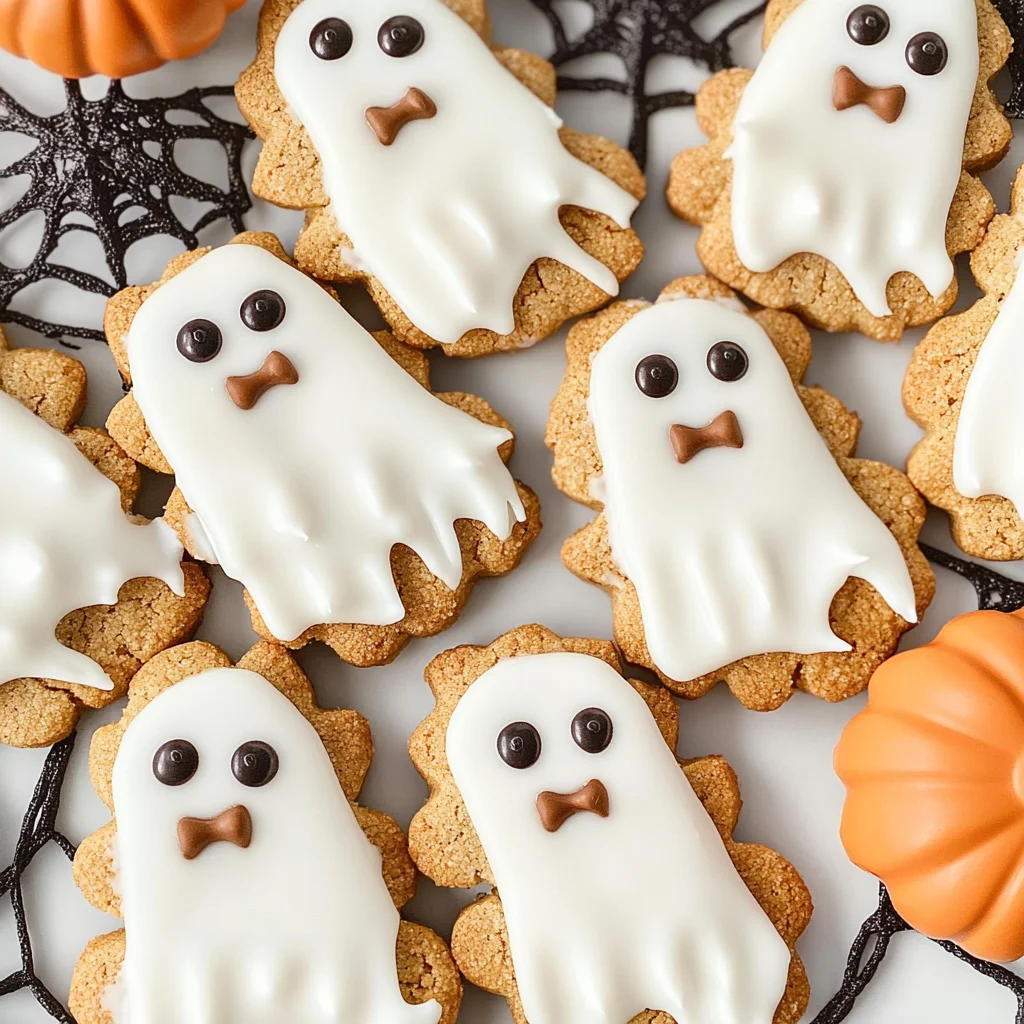
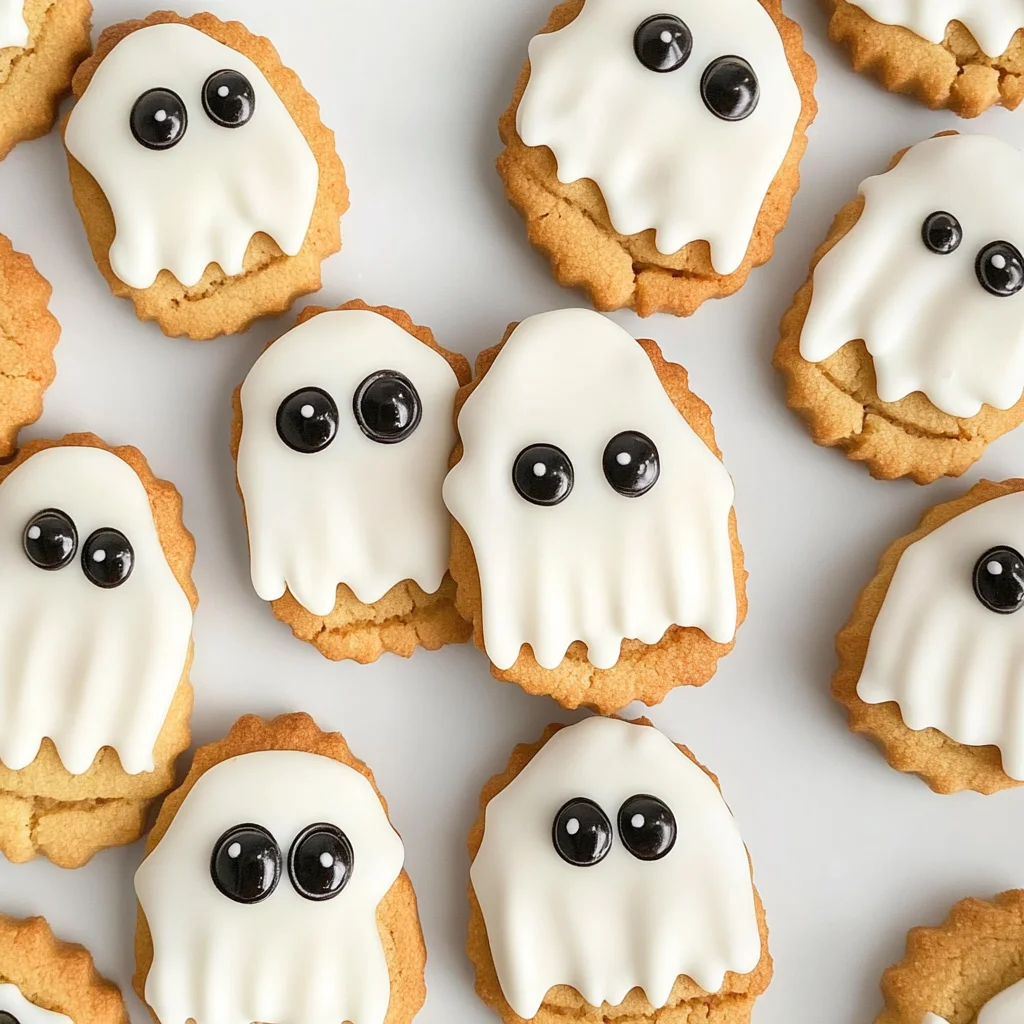
Nutter Butter Ghost Cookies
Nutter Butter Ghost Cookies are the perfect spooky treat for Halloween! These adorable cookies are not only simple to make but also deliciously fun for both kids and adults. With just four ingredients, you can whip up a batch of these ghostly delights that are sure to impress at any Halloween gathering or party.
Why You’ll Love This Recipe
- Super Easy to Make: With only four ingredients, these cookies come together quickly, making them ideal for last-minute treats.
- Fun Presentation: Their ghostly appearance is sure to delight everyone, especially the kids!
- Versatile Snack: Perfect for Halloween parties, school events, or even just a fun family activity.
- No Baking Required: Simply melt, dip, and decorate—no oven needed!
- Customizable: You can easily adjust the decorations to create different spooky faces or add festive sprinkles.
Tools and Preparation
Before you get started on your Nutter Butter Ghost Cookies, gather a few essential tools. Having the right equipment will make your baking experience smooth and enjoyable.
Essential Tools and Equipment
- Wax paper
- Microwave-safe bowl
- Baking sheet
- Fork or dipping tool
Importance of Each Tool
- Wax paper: This keeps your cookies from sticking and makes cleanup easy.
- Microwave-safe bowl: Essential for melting candy melts evenly without burning them.
- Baking sheet: Provides a sturdy surface for setting your dipped cookies.
Ingredients
How to make the cutest Nutter Butter Ghost Cookies for Halloween using just 4 ingredients.
For the Cookies
- 12 Nutter Butter cookies
- 1 cup white candy melts
- 24 candy eyeballs
- 12 mini chocolate chips
How to Make Nutter Butter Ghost Cookies
Step 1: Prepare Your Workspace
Start by lining a baking sheet with wax paper. This will create a non-stick surface where you can place your dipped cookies as they harden.
Step 2: Melt the Candy Melts
In a small microwave-safe bowl, melt the white candy melts.
1. Set your microwave to 50% power.
2. Heat in 30-second intervals, stirring between each interval.
3. Continue until fully melted (about 4-5 minutes). Be careful not to burn the chocolate!
Step 3: Dip the Cookies
Carefully dip each Nutter Butter cookie into the melted candy.
1. Cover approximately 70-75% of each cookie.
2. Allow excess candy to drip off.
3. Tap the cookie lightly on the side of the bowl if needed.
Step 4: Decorate Your Ghosts
While the candy coating is still wet:
1. Press 2 candy eyeballs onto each cookie.
2. Add 1 mini chocolate chip below the eyes to create a mouth.
Step 5: Let Them Set
Place your decorated cookies on the lined baking sheet and allow them to set for about 5-10 minutes until firm.
Step 6: Serve and Enjoy!
Once set, serve your adorable Nutter Butter Ghost Cookies at your Halloween festivities and watch them disappear!
How to Serve Nutter Butter Ghost Cookies
These Nutter Butter Ghost Cookies are not just delicious; they also make a fun and festive treat for any Halloween gathering. Here are some creative serving suggestions to elevate your spooky cookie experience.
Creative Platter Ideas
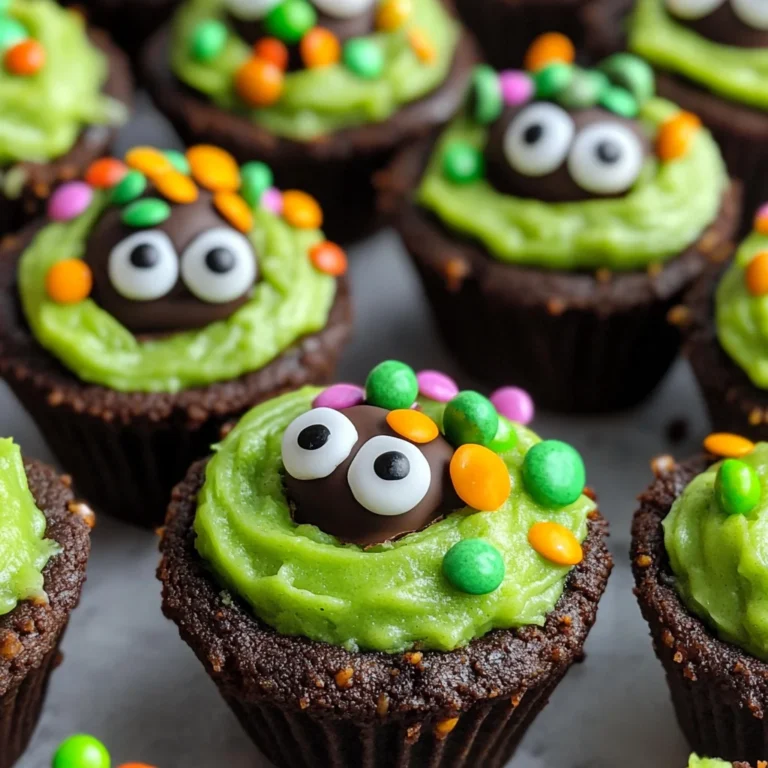
- Spooky Dessert Table: Arrange the cookies on a themed dessert table alongside other Halloween treats like pumpkin cupcakes or ghostly brownies for an eye-catching display.
- Party Favors: Package individual cookies in clear bags tied with black ribbon. These make great party favors for guests to take home.
Beverage Pairings
- Milk: The classic combination of milk and cookies never gets old. Serve chilled milk to complement the sweetness of the Nutter Butter Ghost Cookies.
- Pumpkin Spice Latte: For an autumn twist, pair these cookies with a warm pumpkin spice latte. The flavors blend perfectly for a cozy treat.
Fun Activities
- Cookie Decorating Station: Set up a decorating station with extra candy eyeballs and chocolate chips for guests to personalize their own ghost cookies.
- Halloween Movie Night: Serve these cookies while watching Halloween classics. They will add a sweet touch to your spooky movie marathon.
How to Perfect Nutter Butter Ghost Cookies
To ensure your Nutter Butter Ghost Cookies turn out perfectly, keep these tips in mind.
- Use Fresh Candy Melts: Ensure your candy melts are fresh for the best melting consistency and flavor. Old candy can clump or not melt properly.
- Melt Carefully: Microwave the candy melts in short intervals and stir frequently. This prevents burning and helps achieve a smooth coating.
- Work Quickly: Once you dip the cookies, act fast to place the candy eyeballs and chocolate chips before the coating sets.
- Cool Completely: Allow the cookies to cool fully on wax paper before transferring them to avoid sticking or breaking.
Best Side Dishes for Nutter Butter Ghost Cookies
If you’re looking to complement your Nutter Butter Ghost Cookies with some delightful side dishes, consider these options. They can enhance your Halloween spread and provide a variety of flavors.
- Pumpkin Soup: A creamy pumpkin soup adds warmth and seasonal flavor, perfect for fall gatherings.
- Apple Slices with Caramel Dip: Crunchy apple slices paired with sweet caramel dip offer a refreshing contrast to the rich cookies.
- Cheese Platter: A selection of cheeses can balance out the sweetness of the cookies, providing savory bites that guests will enjoy.
- Veggie Tray with Hummus: Fresh veggies served with hummus make for a healthy option that complements the indulgent treats.
- Chocolate-Covered Pretzels: These salty-sweet snacks are easy to grab and pair well with ghost cookies for added crunch.
- Popcorn Mix: Create a fun popcorn mix using caramel corn, nuts, and seasonal candies for an exciting snack option that enhances the festive atmosphere.
Common Mistakes to Avoid
To ensure your Nutter Butter Ghost Cookies turn out perfectly, avoid these common mistakes.
- Skipping the melting process: Rushing the melting of candy melts can result in burned chocolate. Always melt in short intervals and stir to keep the temperature even.
- Overdipping cookies: Dipping too much of the cookie can lead to a messy appearance. Aim for about 70-75% coverage to maintain the ghostly look.
- Not letting them set properly: If you don’t allow enough time for the candy coating to harden, the decorations might slide off. Let them sit undisturbed for 5-10 minutes.
- Using stale cookies: Freshness matters! Stale Nutter Butter cookies won’t provide the desired texture or flavor. Check your cookies before starting.
- Neglecting to customize faces: Making all ghost faces identical can be boring. Get creative with different expressions using candy eyeballs and chocolate chips.
Storage & Reheating Instructions
Refrigerator Storage
- Store in an airtight container for up to 1 week.
- Keep layers separated with wax paper to prevent sticking.
Freezing Nutter Butter Ghost Cookies
- Freeze cookies in a single layer on a baking sheet until firm, then transfer to an airtight container.
- They can be frozen for up to 2 months.
Reheating Nutter Butter Ghost Cookies
- Oven: Preheat to 350°F (175°C). Place cookies on a baking sheet for about 5 minutes until warm.
- Microwave: Heat one cookie at a time on a plate for about 10 seconds. Be careful not to overheat, as they may get soft.
- Stovetop: Use a non-stick skillet on low heat, warming each cookie for about 2 minutes per side.
Frequently Asked Questions
Here are some frequently asked questions regarding Nutter Butter Ghost Cookies.
Can I customize the decorations on my Nutter Butter Ghost Cookies?
Yes! You can use different candies or sprinkles for unique ghost faces.
How long do Nutter Butter Ghost Cookies last?
When stored properly, these cookies can last up to 1 week in the refrigerator and up to 2 months in the freezer.
What is the best way to store Nutter Butter Ghost Cookies?
Keep them in an airtight container with layers separated by wax paper in order to maintain freshness.
Can I make these cookies ahead of time?
Definitely! You can prepare and decorate them a day in advance; just store them properly before serving.
Final Thoughts
Nutter Butter Ghost Cookies are not only adorable but also incredibly easy to make with just four ingredients. They are perfect for Halloween gatherings or as fun treats anytime. Feel free to customize faces or add seasonal sprinkles for more flair!
Nutter Butter Ghost Cookies

Nutter Butter Ghost Cookies are a whimsical and delicious treat perfect for Halloween festivities. With just four simple ingredients, these charming cookies are easy to prepare, making them a go-to choice for both kids and adults alike. Their delightful ghostly appearance is sure to impress your guests, while the no-bake method allows for quick assembly—just melt, dip, and decorate! Customize each cookie with unique expressions using candy eyeballs and chocolate chips, adding a personal touch to your treats. Whether you’re hosting a spooky gathering or looking for a fun family activity, these Nutter Butter Ghost Cookies will bring joy to any occasion!
- Prep Time: 15 minutes
- Cook Time: 0 minutes
- Total Time: 15 minutes
- Yield: Makes 12 cookies 1x
- Category: Dessert
- Method: No-Bake
- Cuisine: American
Ingredients
- 12 Nutter Butter cookies
- 1 cup white candy melts
- 24 candy eyeballs
- 12 mini chocolate chips
Instructions
- Line a baking sheet with wax paper.
- In a microwave-safe bowl, melt the white candy melts at 50% power in 30-second intervals, stirring until smooth (about 4-5 minutes).
- Dip each Nutter Butter cookie into the melted candy, covering about 70-75%. Tap off excess candy.
- While the coating is still wet, place two candy eyeballs on each cookie and add one mini chocolate chip below as a mouth.
- Set the decorated cookies on the lined baking sheet for about 5-10 minutes until firm.
- Serve and enjoy your spooky treats!
Nutrition
- Serving Size: 1 cookie
- Calories: 150
- Sugar: 15g
- Sodium: 35mg
- Fat: 7g
- Saturated Fat: 4g
- Unsaturated Fat: 2g
- Trans Fat: 0g
- Carbohydrates: 20g
- Fiber: 0g
- Protein: 1g
- Cholesterol: 0mg