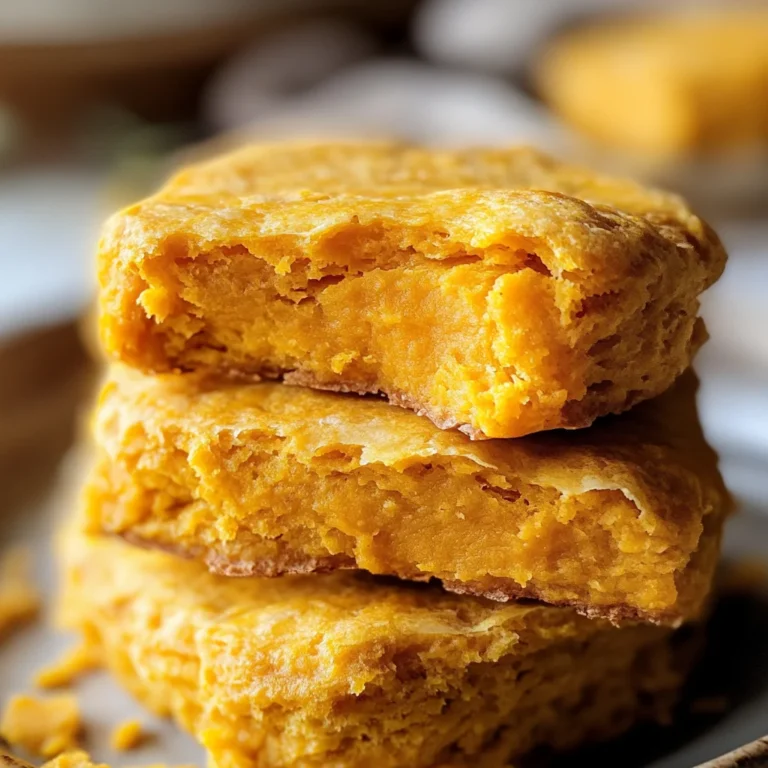
Cheddar Garlic Biscuit Twists
Indulge in the irresistible flavor of Cheddar Garlic Biscuit Twists that are easy to make and perfect for any occasion! These delightful twists are not only simple but also packed with cheesy goodness and aromatic garlic. Ideal as a snack or a side dish, they stand out for their golden crust and soft, buttery interior. Your family and friends will love these flavorful bites, making them a great addition to any meal or gathering.
Why You’ll Love This Recipe
- Quick Preparation: With minimal prep time, you can whip these up in no time.
- Flavor Explosion: The combination of cheddar cheese and garlic creates an irresistible taste.
- Versatile Use: Perfect as a snack, appetizer, or side dish for any meal.
- Kid-Friendly: A fun shape that kids will enjoy helping to make and eat!
- Freezer Friendly: Make a large batch and freeze for later use.
Tools and Preparation
Having the right tools makes the process easier and ensures your Cheddar Garlic Biscuit Twists turn out perfectly. Here’s what you’ll need:
Essential Tools and Equipment
- Baking sheet
- Parchment paper
- Mixing bowl
- Rolling pin
Importance of Each Tool
- Baking sheet: Provides even heat distribution for perfectly baked biscuits.
- Parchment paper: Prevents sticking and makes cleanup a breeze.
- Mixing bowl: Essential for combining ingredients without mess.
- Rolling pin: Helps achieve the perfect thickness for your biscuit dough.

Ingredients
For the Dough
- All-purpose flour
- Baking powder
- Salt
- Unsalted butter
- Shredded cheddar cheese
For the Flavoring
- Minced garlic
- Garlic powder
- Chopped fresh parsley
How to Make Cheddar Garlic Biscuit Twists
Step 1: Preheat the Oven
Preheat your oven to 400°F (200°C). This ensures your biscuits will bake evenly and turn golden brown.
Step 2: Prepare Your Baking Sheet
Line your baking sheet with parchment paper. This step prevents sticking and makes cleanup effortless.
Step 3: Mix Dry Ingredients
In a mixing bowl, combine:
1. All-purpose flour
2. Baking powder
3. Salt
Whisk until well blended.
Step 4: Add Wet Ingredients
Cut in unsalted butter into the dry mixture until it resembles coarse crumbs. Then, fold in:
1. Shredded cheddar cheese
2. Minced garlic
Mix until just combined.
Step 5: Roll Out the Dough
On a floured surface, roll out the dough to about 1/2-inch thickness. Use a sharp knife or pizza cutter to slice the dough into strips.
Step 6: Twist & Bake
Twist each strip gently and place them on the prepared baking sheet. Bake in the preheated oven for 12-15 minutes or until golden brown.
Step 7: Add Finishing Touches
Remove from the oven and sprinkle with additional garlic powder, chopped fresh parsley, or melted butter if desired. Serve warm and enjoy your delicious Cheddar Garlic Biscuit Twists!
How to Serve Cheddar Garlic Biscuit Twists
Cheddar Garlic Biscuit Twists are versatile and can be enjoyed in many ways. Whether you’re hosting a gathering or just having a cozy night in, these biscuit twists are sure to impress.
As an Appetizer
- Serve warm with marinara sauce or garlic butter for dipping. The combination of flavors will delight your guests.
With Soups and Stews
- Pair these biscuit twists with hearty soups or stews. Their cheesy goodness complements the warmth of your favorite comfort dishes.
For Breakfast
- Enjoy Cheddar Garlic Biscuit Twists alongside scrambled eggs or a fresh fruit salad for a delightful breakfast treat that adds a savory touch.
At Parties
- Set out a platter of biscuit twists at your next gathering. They make an excellent finger food that everyone will love.
As a Snack
- Perfect for snacking, these twists are easy to grab and enjoy any time of the day. Add some fresh herbs on top for extra flavor!
How to Perfect Cheddar Garlic Biscuit Twists
To make your Cheddar Garlic Biscuit Twists even more delicious, consider these helpful tips.
- Use Fresh Ingredients: Always use fresh garlic and high-quality cheese for the best flavor.
- Chill the Dough: Letting your dough chill before twisting helps maintain its shape and texture while baking.
- Don’t Overmix: Mix your ingredients just until combined. Overmixing can lead to tough biscuits.
- Brush with Butter: A light brush of melted butter before serving enhances the flavor and gives them a beautiful golden color.
- Experiment with Cheese: Feel free to mix different cheeses like mozzarella or pepper jack for added flavor variations.
Best Side Dishes for Cheddar Garlic Biscuit Twists
These biscuit twists pair excellently with various side dishes, making them even more enjoyable. Here are some great options to consider.
- Garden Salad
A light garden salad with mixed greens and vinaigrette balances the richness of the biscuit twists. - Vegetable Stir-Fry
Colorful vegetables stir-fried in soy sauce bring freshness to the meal and complement the cheesy flavors. - Creamy Tomato Soup
A bowl of creamy tomato soup is comforting and pairs perfectly for dipping those biscuit twists. - Roasted Vegetables
Seasonal roasted vegetables add a caramelized sweetness that contrasts beautifully with the savory biscuits. - Potato Wedges
Crispy potato wedges seasoned with herbs provide a satisfying crunch alongside the soft biscuit twists. - Coleslaw
A tangy coleslaw offers a refreshing crunch that enhances each bite of the Cheddar Garlic Biscuit Twists. - Stuffed Bell Peppers
These hearty peppers filled with rice and veggies make for a filling side dish that complements the biscuits well.
Common Mistakes to Avoid
Making Cheddar Garlic Biscuit Twists can be simple, but there are common mistakes that can affect the outcome. Here are some pitfalls to watch for:
- Skipping the cheese: Not using enough cheddar cheese will lead to bland biscuits. Be generous with your cheese for maximum flavor.
- Overworking the dough: Kneading the dough too much can make the biscuits tough. Mix just until combined for a better texture.
- Incorrect oven temperature: Baking at too low a temperature can result in undercooked biscuits. Preheat your oven properly to ensure even baking.
- Ignoring the garlic: Using fresh garlic instead of garlic powder enhances flavor significantly. Fresh minced garlic adds a punch that dried forms cannot replicate.
- Not twisting properly: Failing to twist the biscuits well may prevent them from rising correctly. Make sure to twist each biscuit fully for an airy, fluffy result.

Storage & Reheating Instructions
Refrigerator Storage
- Store in an airtight container for up to 3 days.
- Allow biscuits to cool completely before sealing.
Freezing Cheddar Garlic Biscuit Twists
- Freeze in a single layer on a baking sheet, then transfer to a freezer-safe bag or container.
- They can be stored for up to 3 months.
Reheating Cheddar Garlic Biscuit Twists
- Oven: Preheat oven to 350°F (175°C) and bake for 10-15 minutes until warm.
- Microwave: Heat on medium power for about 20-30 seconds; cover with a damp paper towel.
- Stovetop: Use a skillet over low heat for about 5 minutes, flipping occasionally until heated through.
Frequently Asked Questions
Here are some common questions about making Cheddar Garlic Biscuit Twists:
Can I use other types of cheese?
Yes! Feel free to experiment with different cheeses like mozzarella or pepper jack for varied flavors.
What is the best way to serve Cheddar Garlic Biscuit Twists?
These biscuit twists pair wonderfully with soups, salads, or as a standalone snack with dipping sauces.
How can I customize my Cheddar Garlic Biscuit Twists?
You can add herbs like chives or parsley, or include spices such as paprika for extra flavor.
Can I make these biscuits gluten-free?
Absolutely! Substitute regular flour with a gluten-free all-purpose blend for delicious results.
Final Thoughts
Cheddar Garlic Biscuit Twists are not only delightful but also versatile enough for any meal. Their cheesy, garlicky goodness makes them irresistible! Feel free to customize them with your favorite ingredients and enjoy these tasty treats any time.
Cheddar Garlic Biscuit Twists

Indulge in the delightful taste of Cheddar Garlic Biscuit Twists, an effortless and mouthwatering addition to any meal or gathering. These savory treats are filled with rich cheddar cheese and aromatic garlic, creating a flavor-packed experience that everyone will love. With their soft, buttery texture and golden crust, these biscuit twists are perfect as appetizers, snacks, or side dishes. Quick to prepare and freezer-friendly, they make for an excellent go-to recipe whenever you’re craving something cheesy and delicious.
- Prep Time: 15 minutes
- Cook Time: 15 minutes
- Total Time: 30 minutes
- Yield: About 12 biscuit twists
- Category: Appetizer
- Method: Baking
- Cuisine: American
Ingredients
- All-purpose flour
- Baking powder
- Salt
- Unsalted butter
- Shredded cheddar cheese
- Minced garlic
- Garlic powder
- Chopped fresh parsley
Instructions
- Preheat your oven to 400°F (200°C) and line a baking sheet with parchment paper.
- In a mixing bowl, whisk together the all-purpose flour, baking powder, and salt.
- Cut in the unsalted butter until the mixture resembles coarse crumbs. Fold in the shredded cheddar cheese and minced garlic until just combined.
- Roll out the dough on a floured surface to about 1/2-inch thickness and cut into strips.
- Twist each strip gently and place them on the prepared baking sheet.
- Bake for 12-15 minutes or until golden brown.
- Remove from oven and sprinkle with additional garlic powder or chopped parsley before serving warm.
Nutrition
- Serving Size: 1 twist
- Calories: 110
- Sugar: 0g
- Sodium: 230mg
- Fat: 7g
- Saturated Fat: 4g
- Unsaturated Fat: 2g
- Trans Fat: 0g
- Carbohydrates: 10g
- Fiber: 0g
- Protein: 3g
- Cholesterol: 15mg